
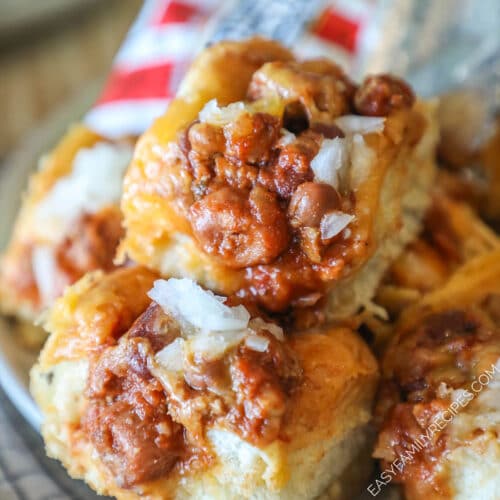
Chili Dog Sliders are the ultimate easy party food or quick weeknight family dinner that no one can turn down! These hand-held little sliders are packed with all the classic chili dog flavors that everyone loves and are so easy to make because they’re all baked together in one pan. This simple recipe is a crowd-pleaser that takes minimal effort, but has big chili-cheesy flavor!

“Effortless” is the name of the game when you need an easy family dinner or have minimal time to prep for a party! THIS recipe is that perfect, effortless recipe! As if chili cheese hot dogs aren’t Americana enough, turn them into fun slider sandwiches by filling Hawaiian rolls (cleverly sliced like hot dog buns!) with shredded cheese, individual Little Smokies sausage, a spoonful of your favorite chili, top with more cheese then bake all together in one pan! It’s chili dog perfection and they’re guaranteed to disappear fast! My kids just can’t get enough!
Why I LOVE this recipe!
- Simple ingredients – Five common ingredients are all it takes to put together this quick and fun slider! There’s nothing confusing or complex about this recipe.
- Ready in under 30 min – It only takes 10 minutes of simple prep, then toss in the oven to warm through. They’re truly so easy to make!
- Crowd-pleasing – Perfect for parties, game days, tailgating, holiday gatherings, pot lucks or a quick weeknight dinner!
- Four – reason four.
Recipe Notes
This Chili Dog Slider recipe is as simple as promised! Just 10 minutes of easy prep for a fun, family friendly weeknight dinner.
In this section I am going to go through a few tips and tricks I use for how to make this quick and easy chili dog slider recipe to get the absolute best and most delicious results.
Make sure to scroll to the bottom for the FULL recipe card.
Ingredients + Substitutions
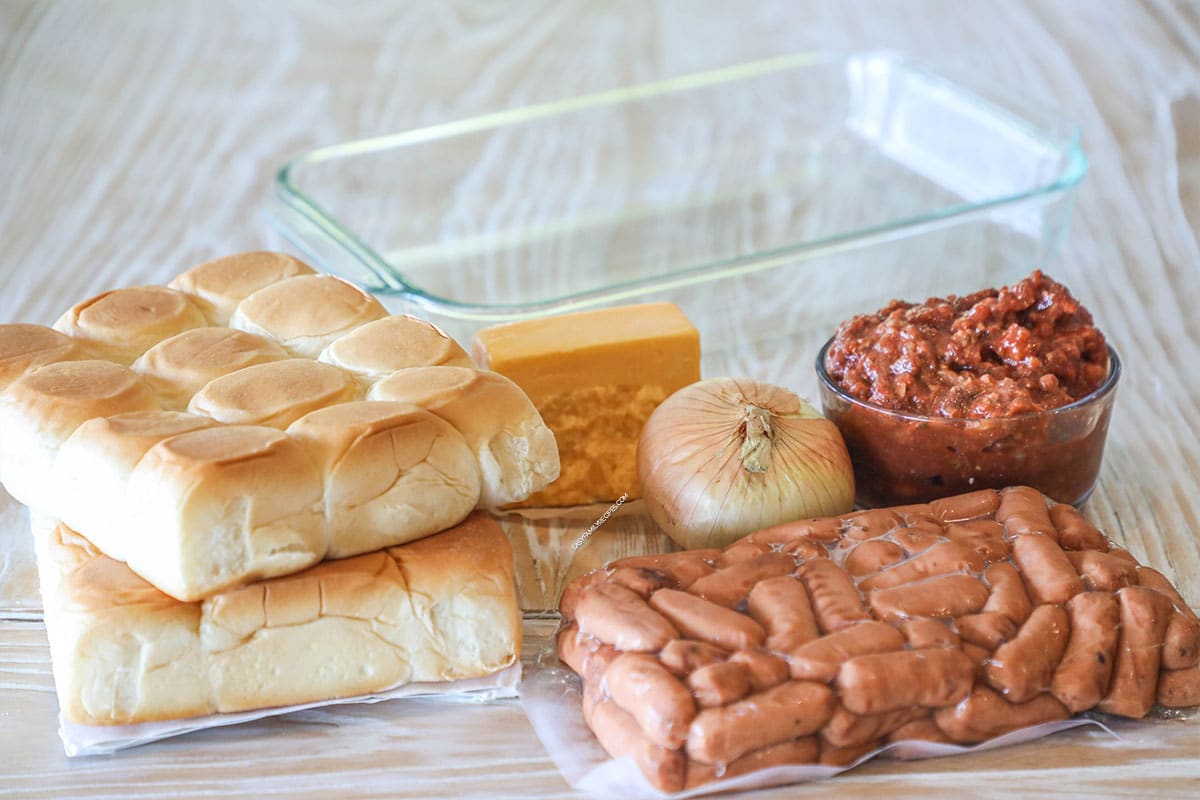
- Hawaiian rolls – You’ll need 2 dozen rolls. Any brand will work! If you don’t have Hawaiian rolls, you can use regular dinner rolls, potato rolls or brioche rolls.
- Little Smokies sausages – 24 sausages- one for each Hawaiian roll. You could use beef, turkey or chicken sausages.
- Chili – You can use any canned chili or make Homemade Crockpot Chili and enjoy the extra chili leftovers for another meal!
- Shredded cheddar cheese – Cheddar cheese is classic for chili dogs, but you can easily sub any other cheese you prefer, such as colby jack, pepper jack or gouda.
- Onion – Finely diced onions can be sprinkled on top after baking. This will add a nice bite to the sliders to cut through the chili and cheese flavors.
Make sure to see the recipe card at the bottom of this post for the full quantities and ingredients list.
Recipe Variations
If you love this recipe as much as we do and want some quick ways to change it up for variety, these little tips will do the trick!
- Spicy Chili Dog Sliders– Kick up the heat by topping your sliders with fresh or pickled jalapeño slices, pepper jack cheese or a drizzle of hot sauce.
- BBQ Chili Dog Sliders – Mix a little barbeque sauce into the chili or drizzle it over the sausages before baking for a sweet & smokey twist.
- Tex-Mex Style Sliders – Swap the cheddar for a Mexican cheese blend, then top with cilantro, pico de gallo, sliced avocado and sour cream.
Recipe Step by Step
I am going to highlight a few key steps in the recipe here, but make sure to jump down to the recipe card for comprehensive instructions on how to make Chili Dog Sliders.
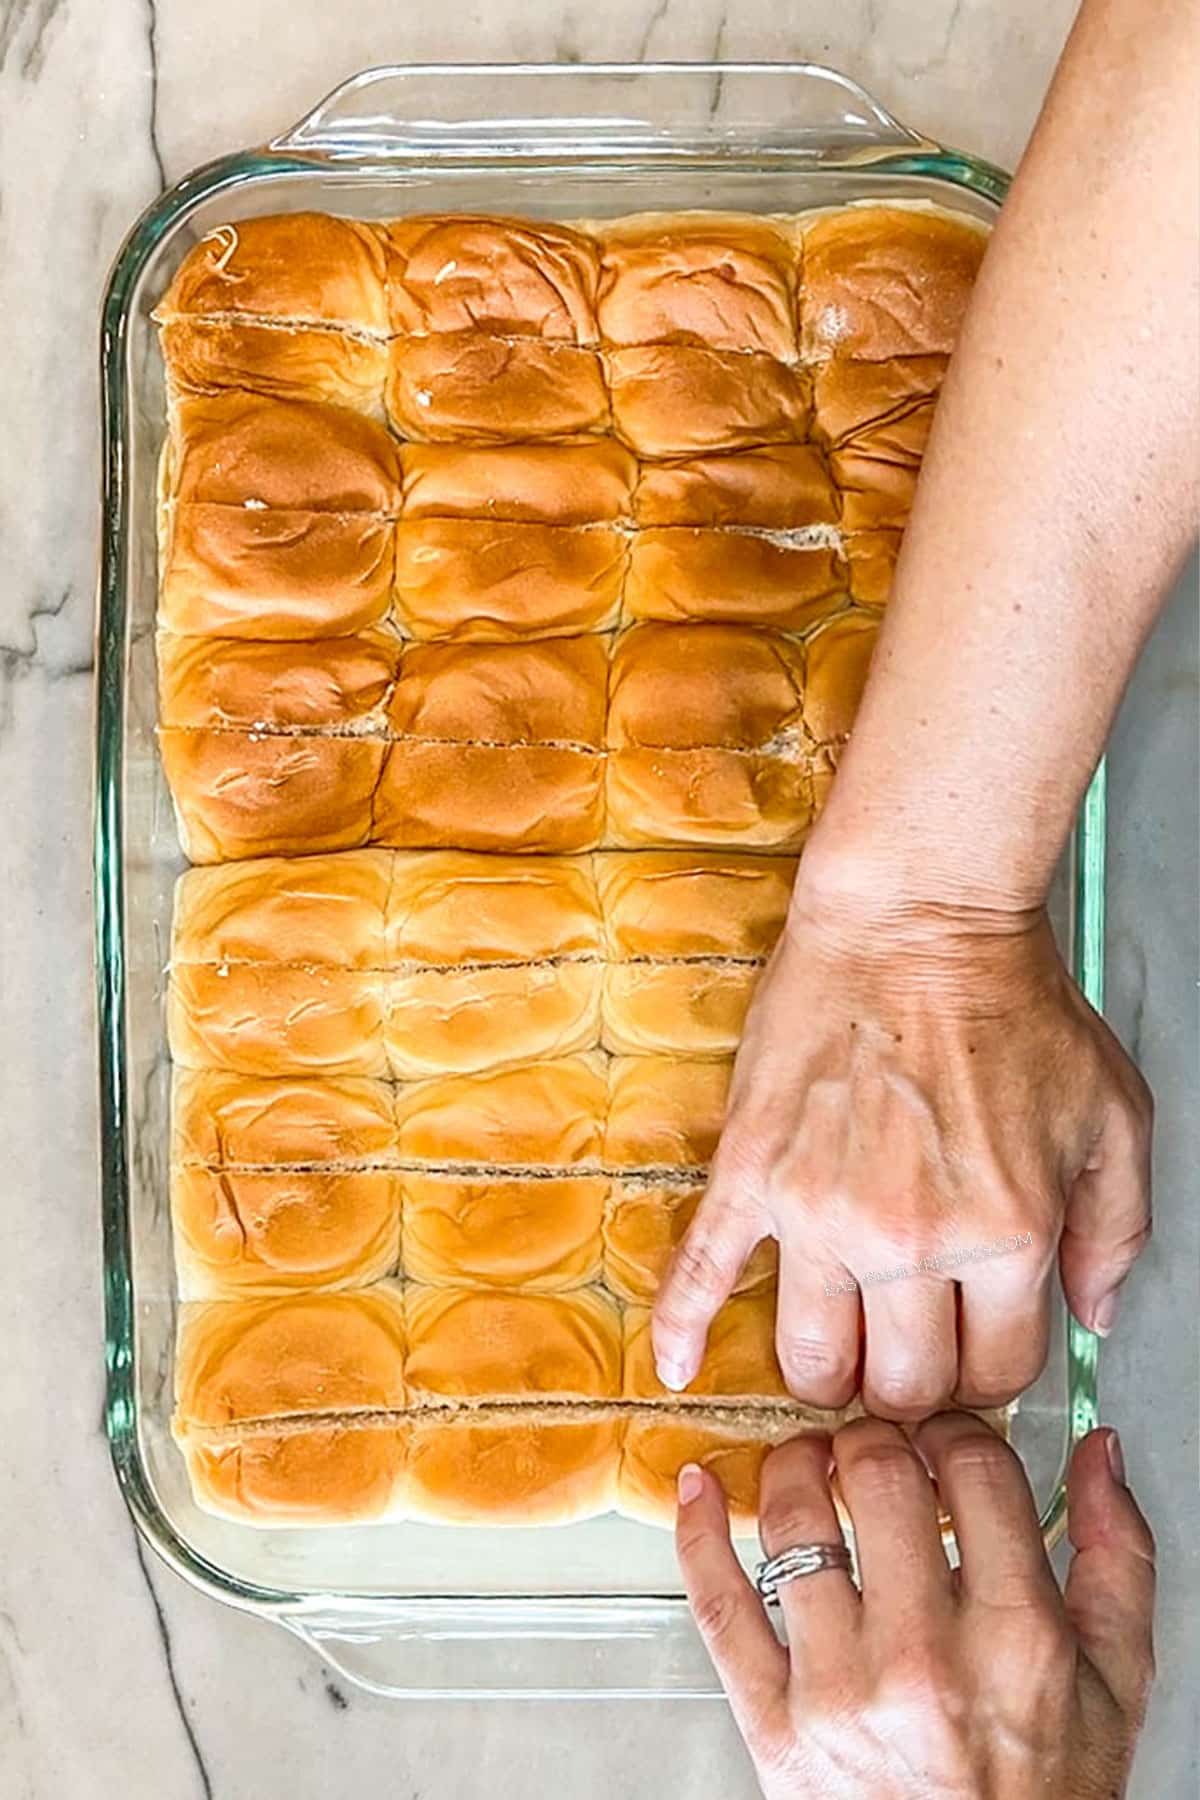
Fit Hawaiian Rolls into baking dish. Slice lengthwise down each row of rolls to make the “hot dog bun.”
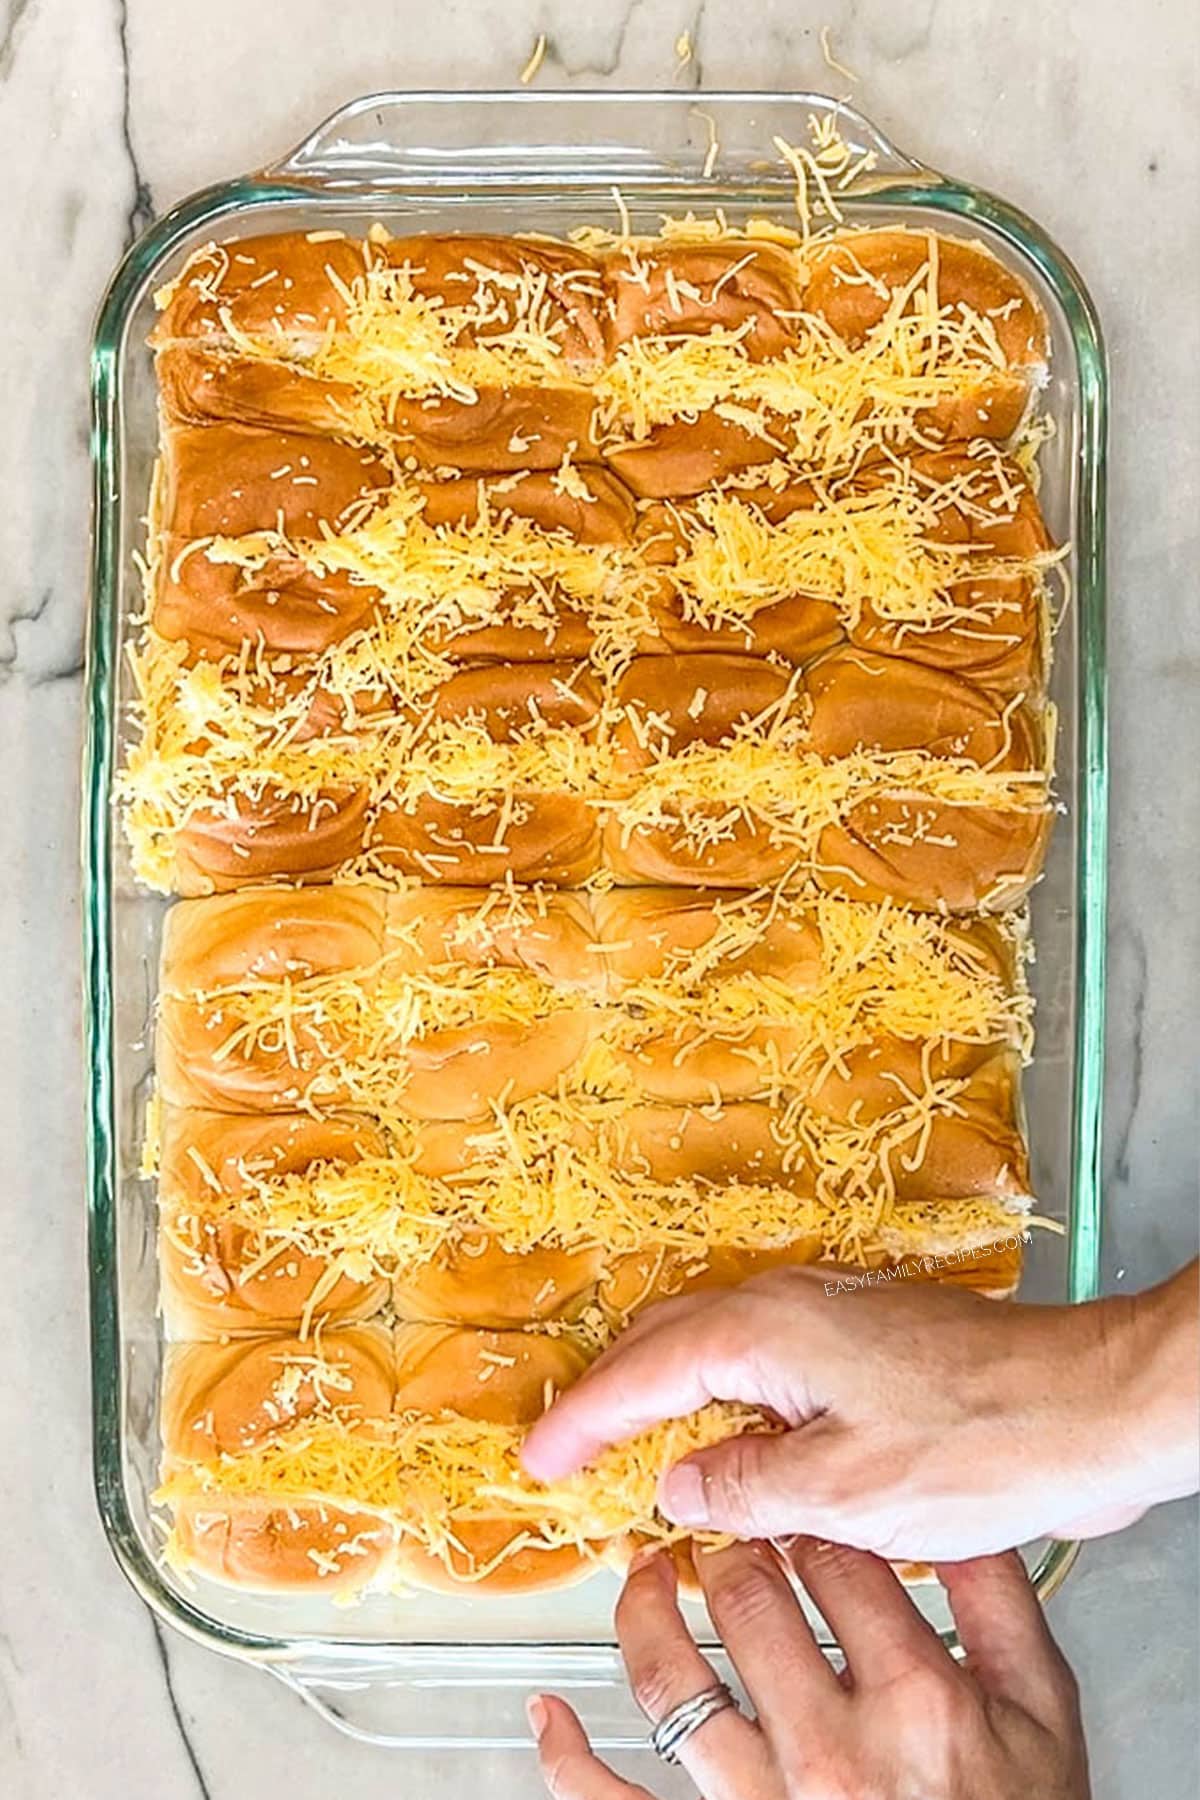
Stuff each slit with shredded cheddar cheese.
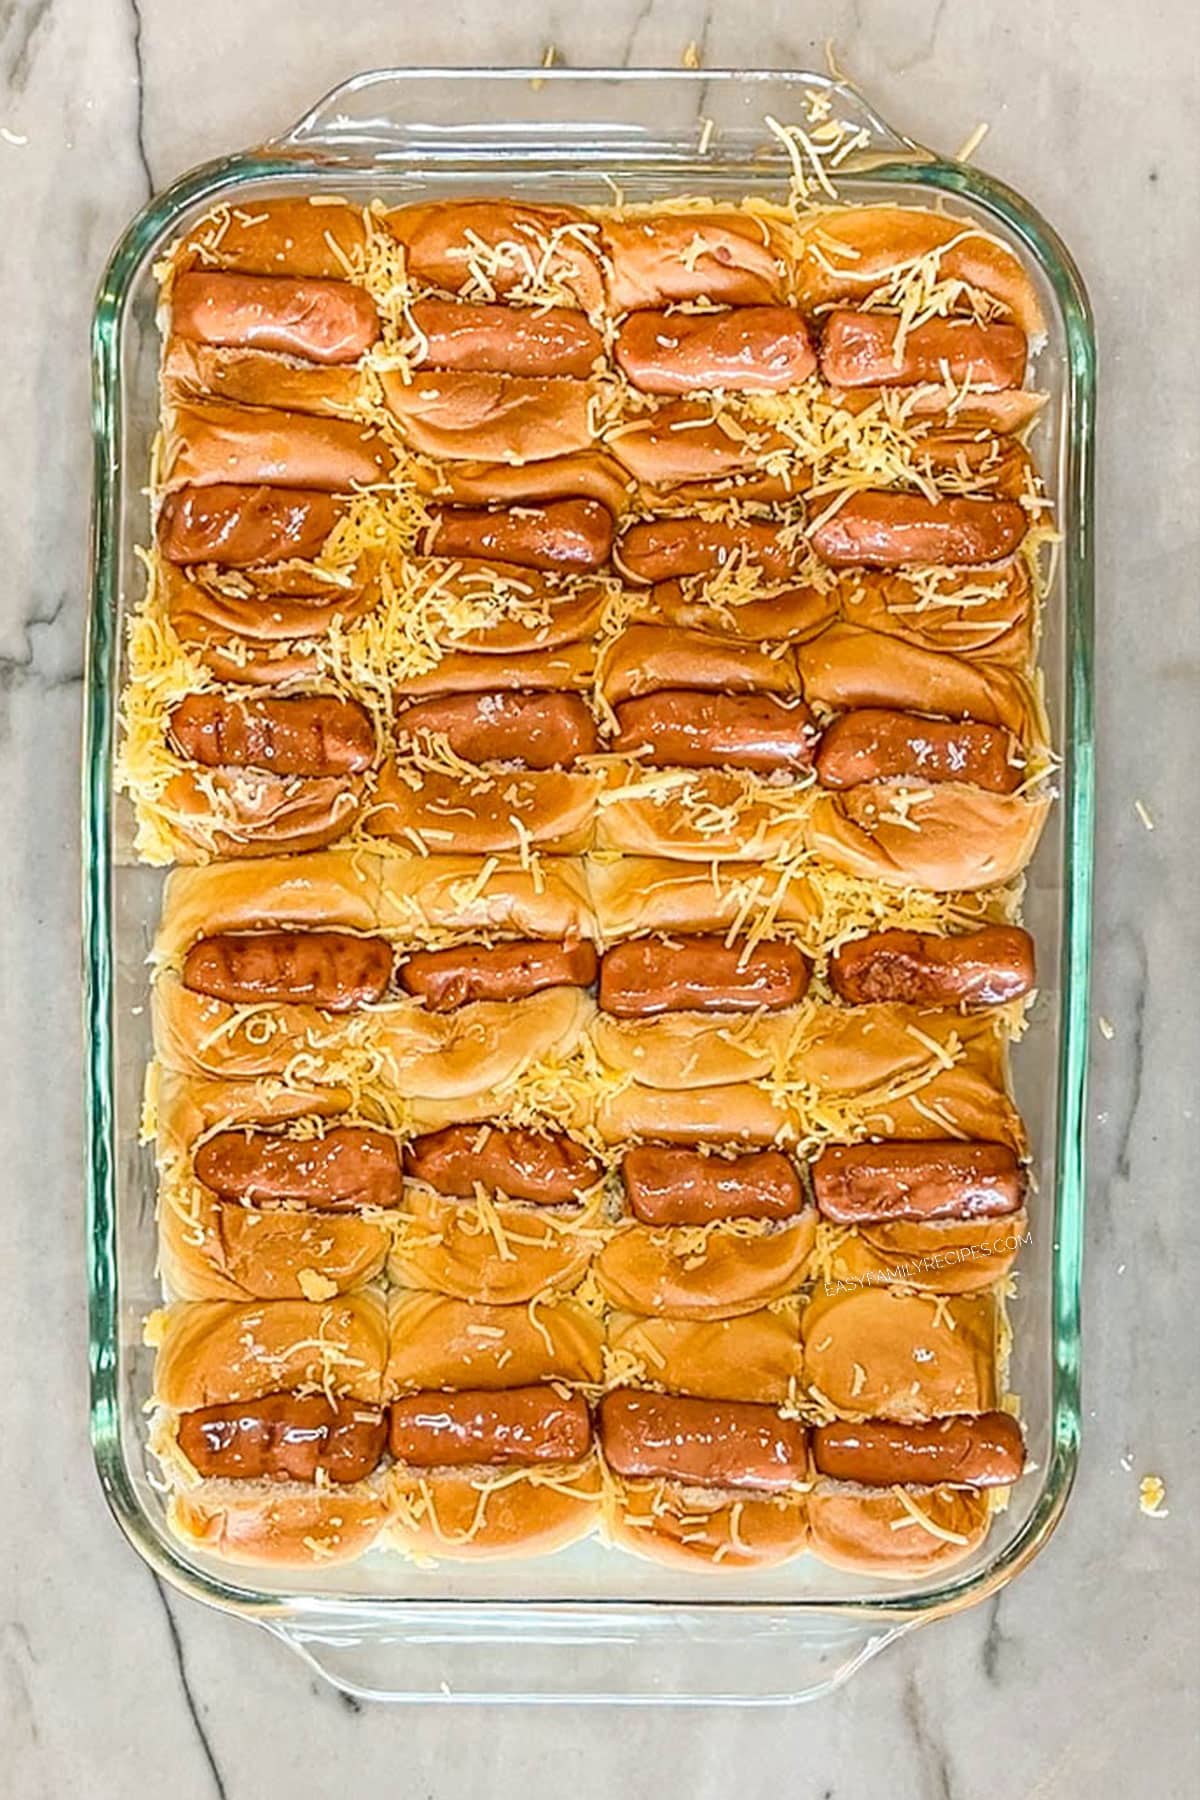
Place a sausge into each roll.
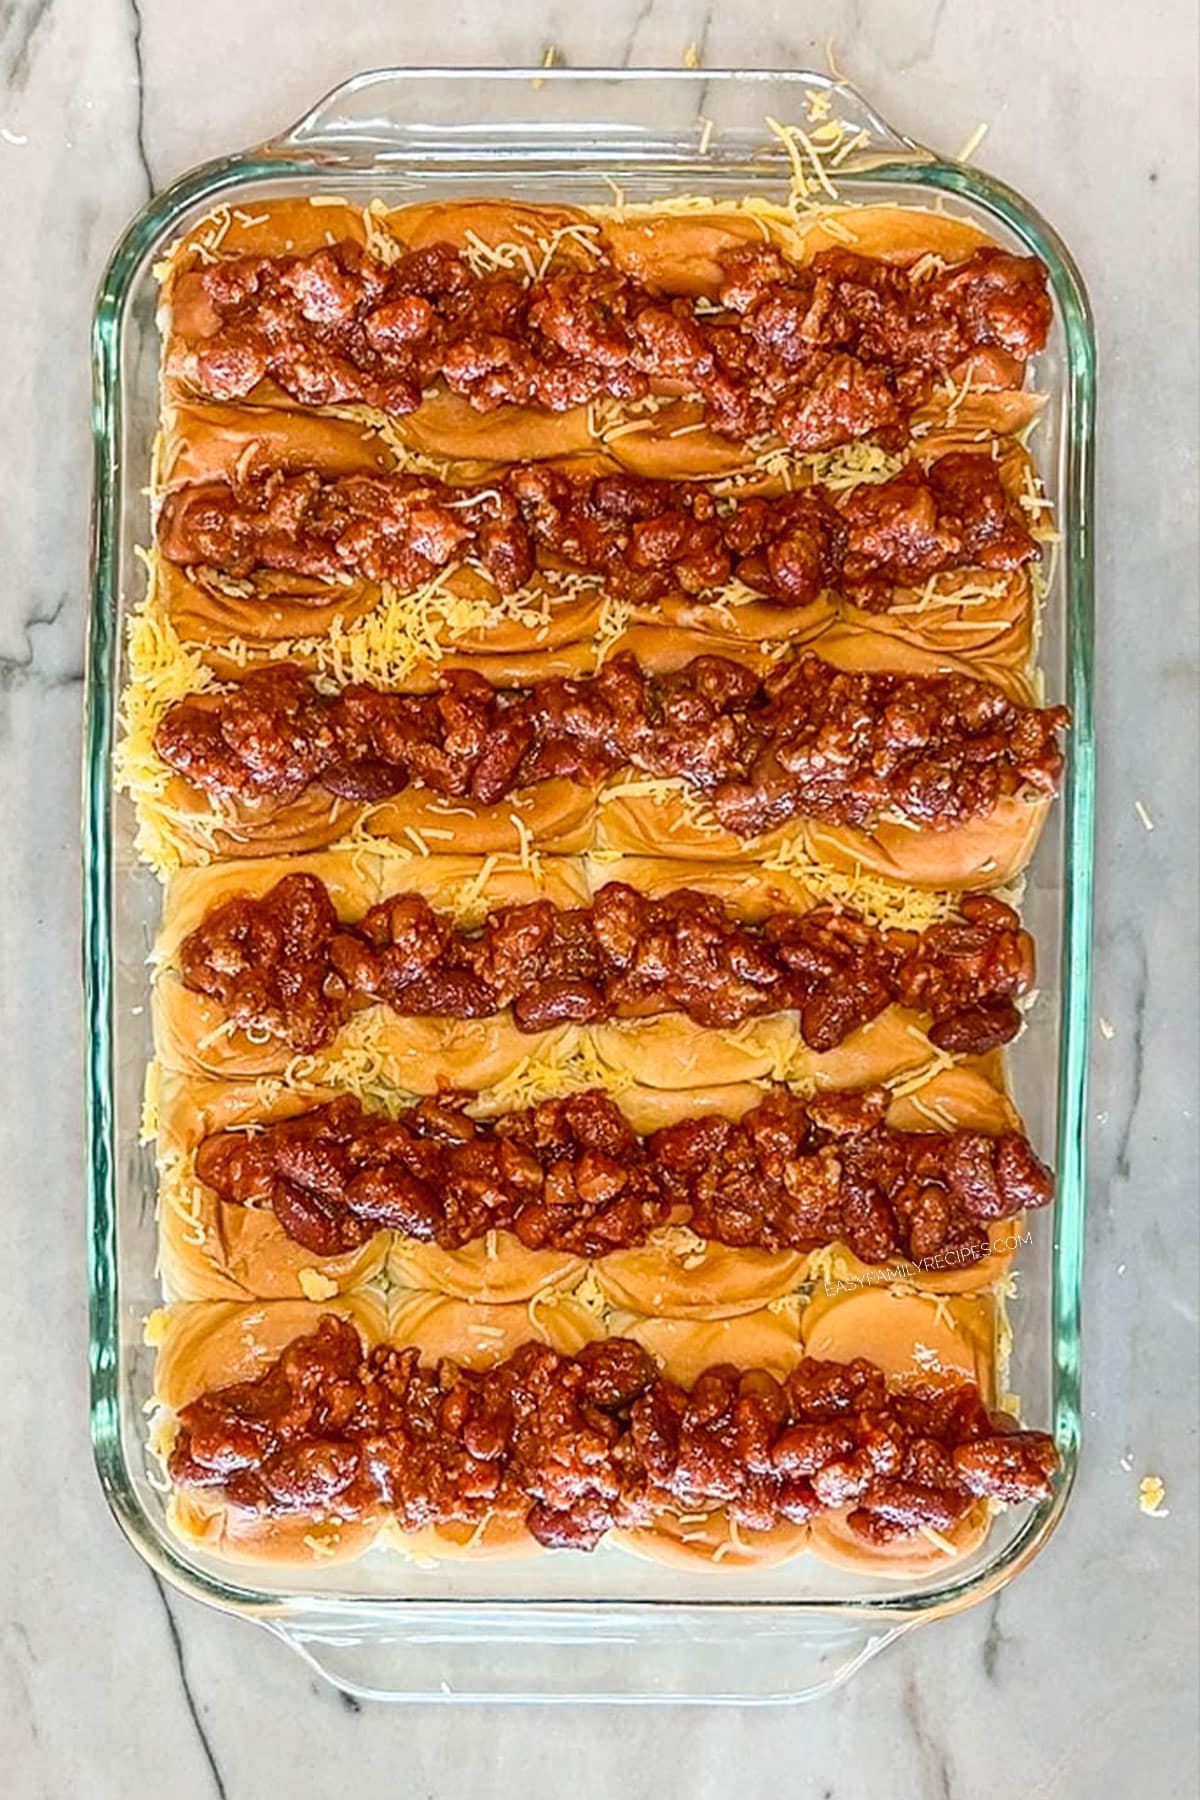
Spoon chili over the top of each sausage.
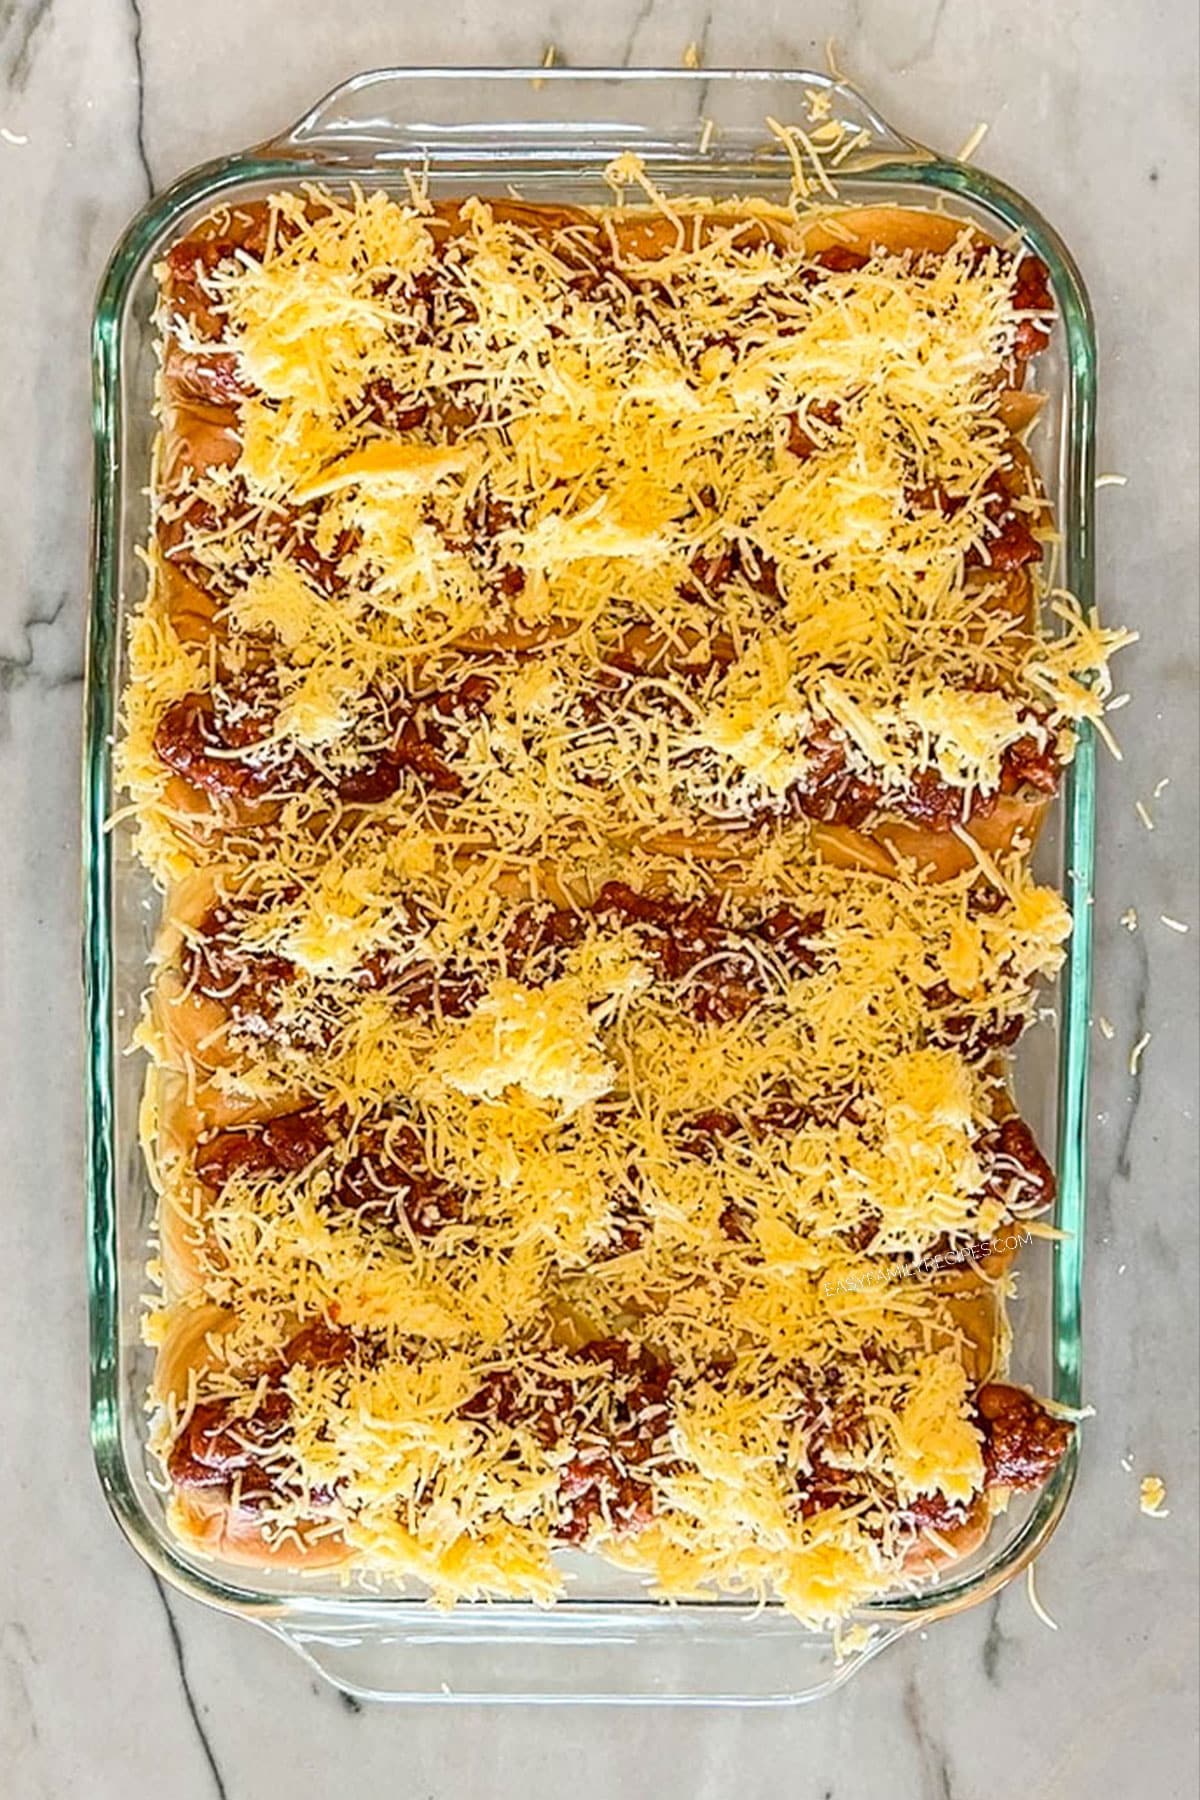
Top with additional shredded cheese.
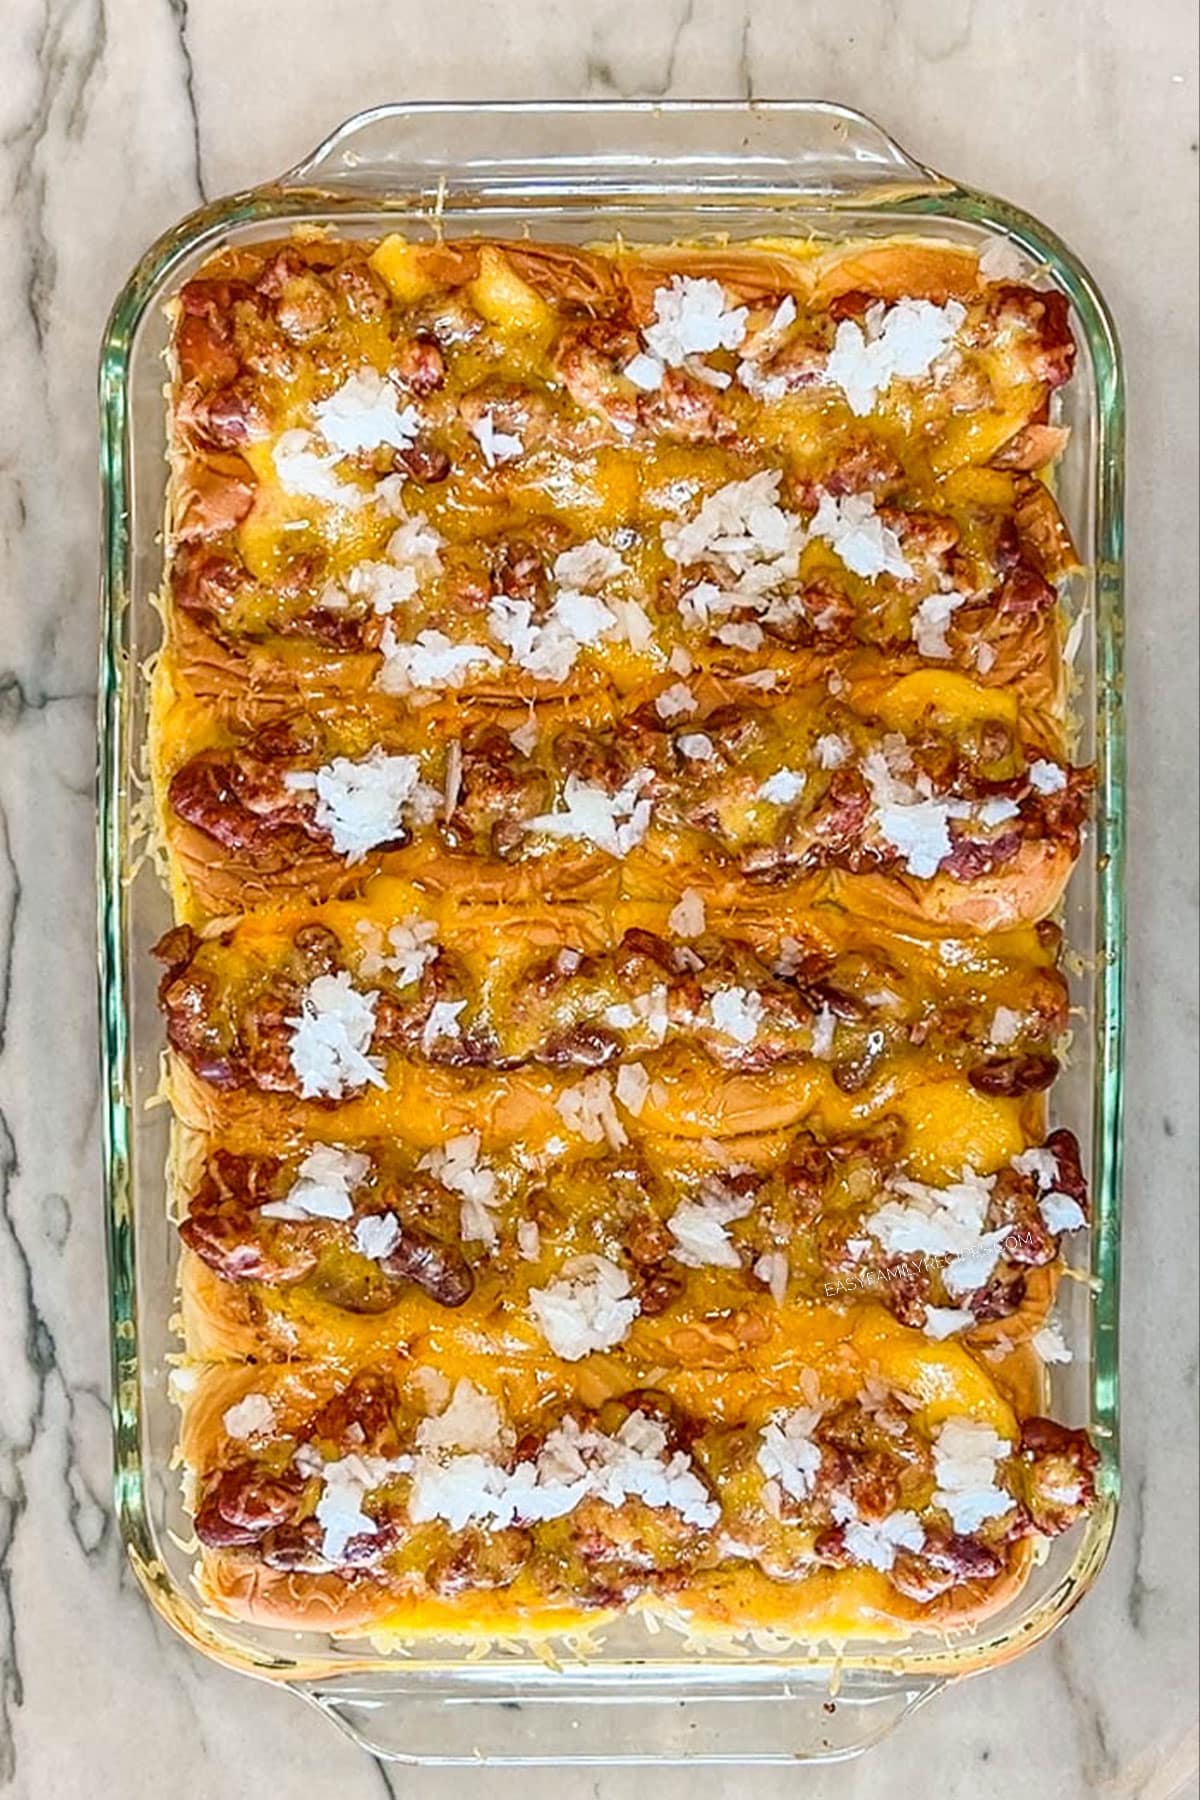
Bake for 15-20 minutes until everything is heated through and the cheese is melted. Top with diced yellow onion.
Recipe Tips
- Add cheese first – By stuffing the cheese into each slit first, I find it helps to protect the rolls from getting too soggy from the chili. It helps the slider hold together.
- Shred your own cheese – Freshly shredded cheese melts more smoothly than bagged, shredded cheese. It’s definitely worth the extra bit of effort, in my opinion.
- Don’t overfill – It’s tempting to pack in lots of chili, but using about 1-2 tablespoons per slider keeps the filling from spilling out while the sliders bake!
- Use a serrated knife – A serrated knife easily cuts through the soft Hawaiian rolls without squishing them!
Recipe Short Cuts
If you need to make this recipe, but are extra short on time, here are a few ideas that can help make this recipe even faster!
- Canned chili – A good quality canned chili works great! Use any variety of thick and hearty chili. You can even grab some chili from Wendy’s in a pinch!
- Slice rolls all at once – Placing the rolls in the pan and slicing them all at once is so much faster than separating the rolls and slicing each individual roll separately.
- Assemble in advance – Assemble the sliders up to 24 hours in advance, cover and refrigerate. When you’re ready to eat, just bake until hot and bubbly.
- Store-bought toppings – Customize your sliders with store bought toppings. You can find diced onions in the produce section of most grocery stores and pre-shredded cheese in the dairy aisle.
Freezer Meal Instructions
Making this easy Chili Dog Slider recipe into a freezer meal is simple! Follow the steps below and you can store this recipe in the freezer for up to 6 months.
To freeze before cooking
- Assemble the sliders in the baking dish as directed, but do not bake.
- Tip: use a thick chili vs a soupy chili to avoid the rolls from becoming soggy. If you’ve cooked the chili before assembling the sliders, allow the chili to cool completely first. Wrap the pan tightly or place in an air tight container and freeze.
- You can bake from frozen or place in the fridge and allow to thaw overnight. Uncover and bake in the oven until warmed through.
How to Freeze Chili Dog Sliders After Cooking
- Allow the sliders to cool completely after baking.
- Place in a freezer-safe bag or airtight container and freeze.
- When you’re ready to enjoy again, you can warm in the oven, microwave or air frier.
What to Serve with Chili Dog Sliders
Since this protein based dinner has the delicious flavors of classic American chili dogs, it will pair well with many of your favorite picnic and party side dishes.
Choose one or several of these side dishes to create a wholesome, well-rounded dinner. There are both classic options and some healthy options to keep it light.
Side Dish Ideas
- BEST Oven Baked Potato Wedges
- Easy Baked Macaroni and Cheese
- Easy Rotini Pasta Salad
- Deviled Egg Potato Salad
- Summer Fruit Salad
Chili Dog Slider Leftovers
If you have leftovers after making this recipe, then it is your lucky day! They save and reheat well. Just keep in an airtight container in the fridge and warm in the microwave.
Recipe FAQ’s
Can I use hot dogs instead of Little Smokies?
Absolutely. Little Smokies are convenient because each one fits perfectly into the individual slider. However, you can absolutely cut hot dogs into thirds and use instead.
How do I keep the sliders from getting soggy?
There are a few things you can do to keep the buns from getting soggy. I would suggest stuffing cheese into the buns first, using a thick chili, don’t overfill the buns and bake immediately so the chili doesn’t have the time to sit on the rolls before baking begins.
How do I know when they’re done baking?
The sliders are ready when the cheese is completely melted, the chili is bubbling and the rolls are lightly toasted on top. The internal temperature should reach 165°F if you’re checking with an instant-read thermometer.
More EASY Dinner Recipes
If you enjoyed this recipe, I really hope you will take a moment to grab a few more easy recipes for another busy night!
You can check out all of my easy dinner recipes here, or see a few of our readers favorite recipes below.
- Cheddar Bay Biscuit Chicken Pot Pie
- Sheet Pan Lasagna
- Baked Chicken Spaghetti
- Tuscan Tomato Tortellini Soup
Chili Dog Sliders
Ingredients
- 24 hawaiian rolls
- 24 little smokies sausages
- 2 cups hearty chili
- 1½ cup shredded cheddar cheese
- 1/2 yellow onion, diced
Instructions
- Preheat oven to 375˚F.
- Fit rolls into a 9×13 baking dish. Then, slice lengthwise down each row of rolls to make the "hot dog bun."
- Stuff each slit with shredded cheese, then place a sausage into each roll. Spoon chili over the top of each sausage, then top with additional cheese.Note: you don't have to add cheese to the bottom, but I find it helps to protect the roll from the wetness of the chili and keep the slider together.
- Bake for 15-20 minutes or until everything is heated through and cheese is melted.
Recipe Notes
- Beef Crockpot Chili
- Crockpot Turkey Chili





















Leave a Reply