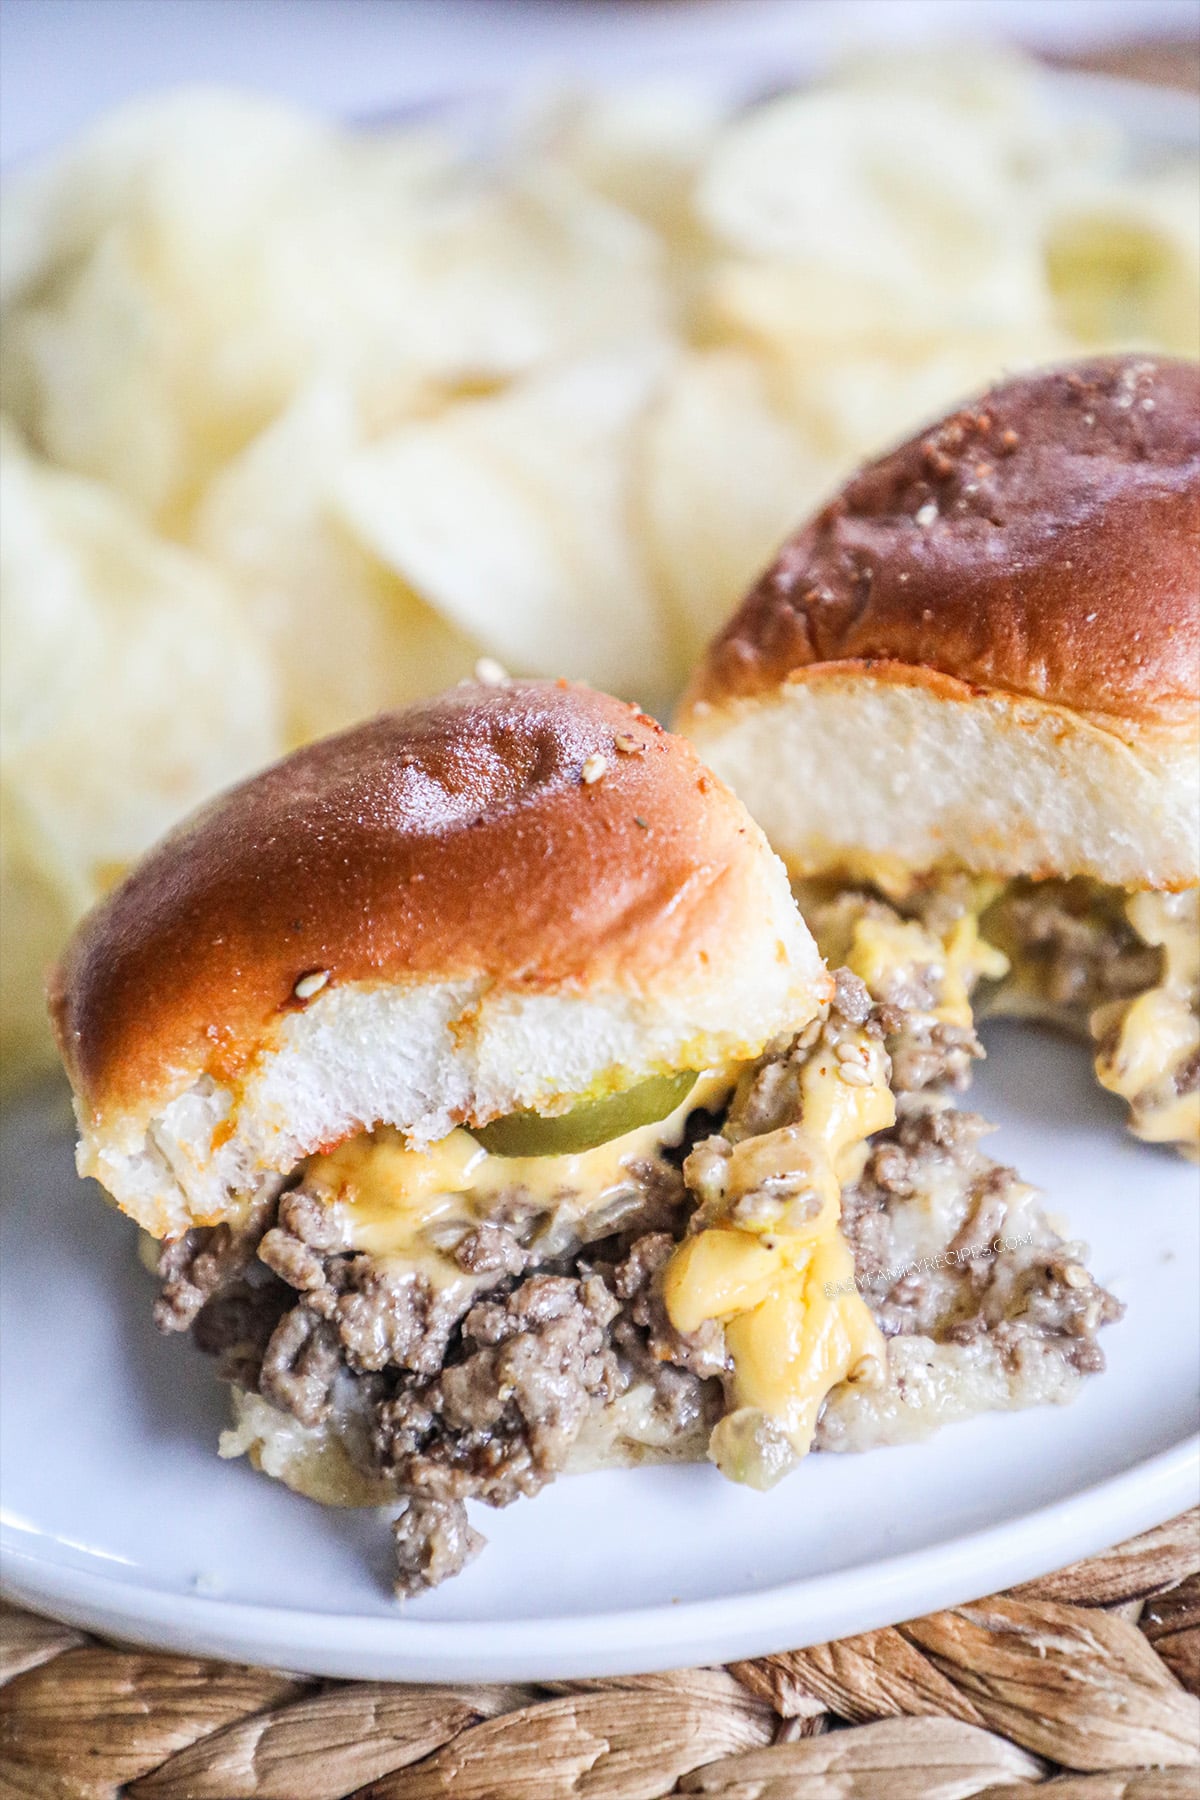
Enjoy the classic take-out taste of Cheeseburger Sliders made on sweet Hawaiian Rolls in minutes in the comfort of your home with this easy recipe. These baked sliders are packed with perfectly seasoned ground beef, layers of cheese, and classic burger toppings then baked to perfection. Quicker and easier than take out and we think these Burger Sliders are even more delicious!

Cheeseburger Sliders – The EASY Way!
These cheeseburger sliders are so quick, so delicious, and so easy to make! They are a kid-friendly hit at the dinner table and can make the perfect appetizer for watching football or a potluck.
But don’t take my word for it, take the millions of folks on Instagram who have been raving about this cheeseburger sliders recipe! I mean, when they are filled with gooey cheese, tender beef, and topped with garlic butter, it’s easy to see why everyone loves them!
Why I LOVE this recipe!
- Family Friendly – These sliders are insanely family friendly. They are easy for parents to make and easy for little hands to grab. Plus, with no spicy or polarizing flavors, even the pickiest of eaters will enjoy them.
- Takeout At Home – It’s no secret that McDonald’s has some of the tastiest little hamburgers. These sliders are inspired by those flavors but quicker, easier, and more wholesome.
- Appetizer or Dinner – I love to take these sliders to parties and barbecues, but they also make a great dinner. There is enough for 2-3 per person for a family of 4 for dinner or just 1 as an appetizer.
- Scalable – Along with being good for a full meal or app, you can also scale this recipe up for as many as you need. This is perfect for when you need to feed dinner to an entire basketball team (those team dinners sure are fun, but they are a lot of work!).
- Budget friendly – This recipe only uses 1 pound of ground beef, yet you get enough food for an entire family. This is one of the best ways to stretch your budget.
Recipe Notes
These easy cheeseburger sliders made on Hawaiian Rolls are as simple as promised! Just 30 minutes for a family-friendly meal.
In this section I am going to go through a few tips and tricks I use when making this recipe to get the absolute best and most delicious results.
Make sure to scroll to the bottom for the FULL recipe card on how to make cheeseburger sliders.
Ingredients + Substitutions
- Kings Hawaiian Rolls – My family loves these rolls because they are slightly sweet and super soft! Plus, a pack of 12 rolls fit perfectly into an 8×8 pan. You can also use store brand Hawaiian Rolls or even homemade.
- Ground Beef – I use lean ground beef because there is less fat to deal with. However, you can use any beef because you will drain the fat anyways.
- Onion – Cooking the beef in onion is a great way to infuse more flavor without any more work! You can leave it out if you have picky kids.
- Worcestershire Sauce
- American Cheese – Most fast food burgers use American cheese so that is what we use here. You can use another type of cheese though. This could be cheddar, Colby jack, pepper jack, mozzarella, or others.
- Ketchup and Mustard – I like to use Heinz because it is what many restaurants use so it gives you that true restaurant flavor.
- Dill Pickles – true to fast food, but leave them off if you don’t like them.
- Seasonings: Salt, pepper, garlic salt, and sesame seeds are all you need for these mini cheeseburger sliders. The garlic salt and sesame seeds make for a delicious sauce while the salt and pepper help season the ground beef.
- Butter – Always brush the tops of slider buns with butter before baking. This combined with sesame seeds makes these baked cheeseburger sliders next level!
Recipe Step by Step
I am going to highlight a few key steps in the recipe here, but make sure to jump down to the recipe card for comprehensive instructions on how to make Hawaiian Roll Sliders.
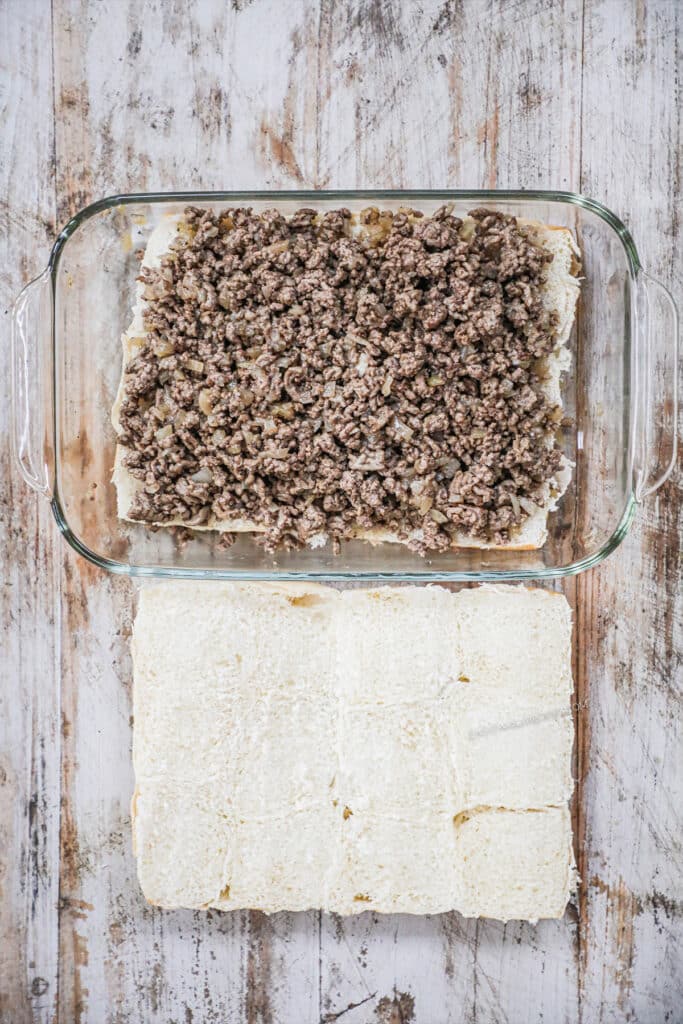
Slice the Hawaiian rolls in half. Spread drained ground beef over the bottom of the rolls.
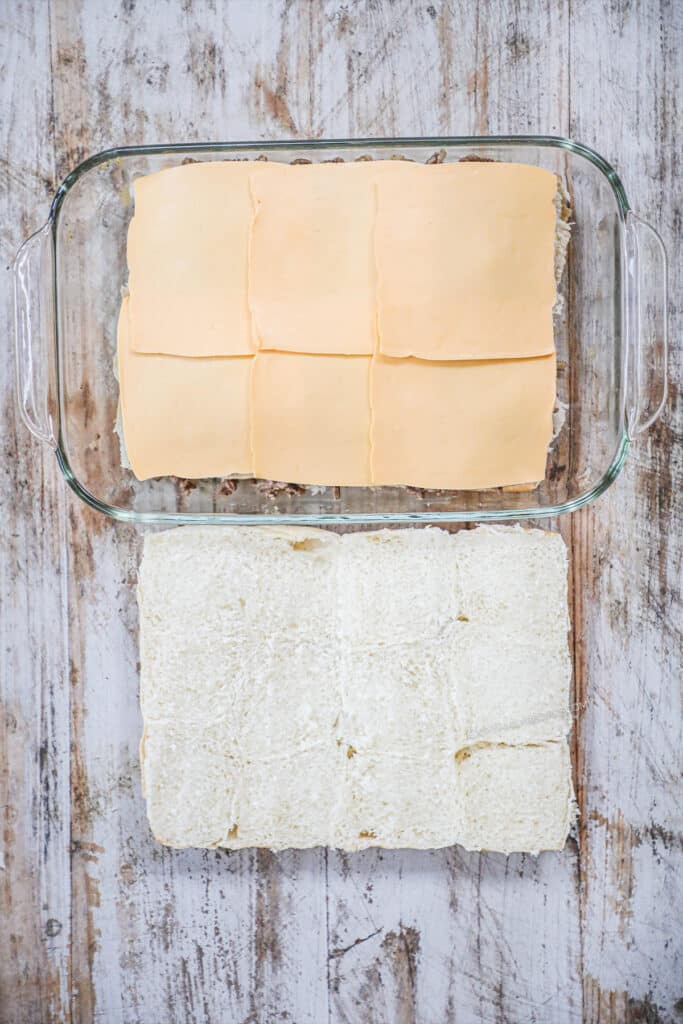
Top with American cheese slices or slices of your preferred cheese.
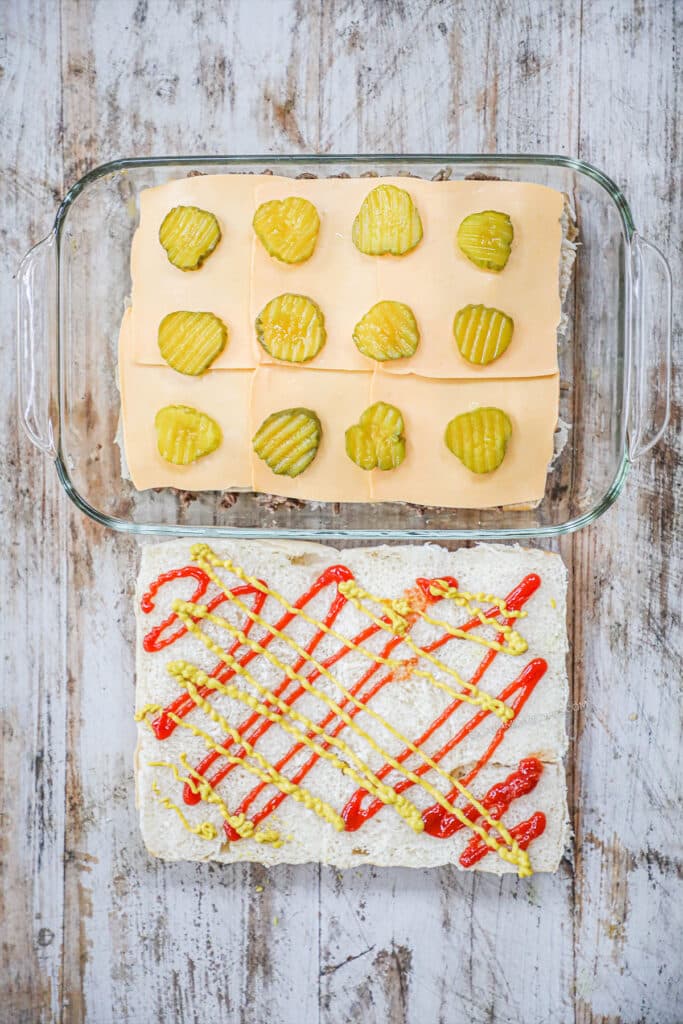
Add pickles on top of the cheese and ketchup and mustard to the top of the rolls. I like to do this before baking because fast food burgers generally have warm pickles and buns and this gives it that vibe.
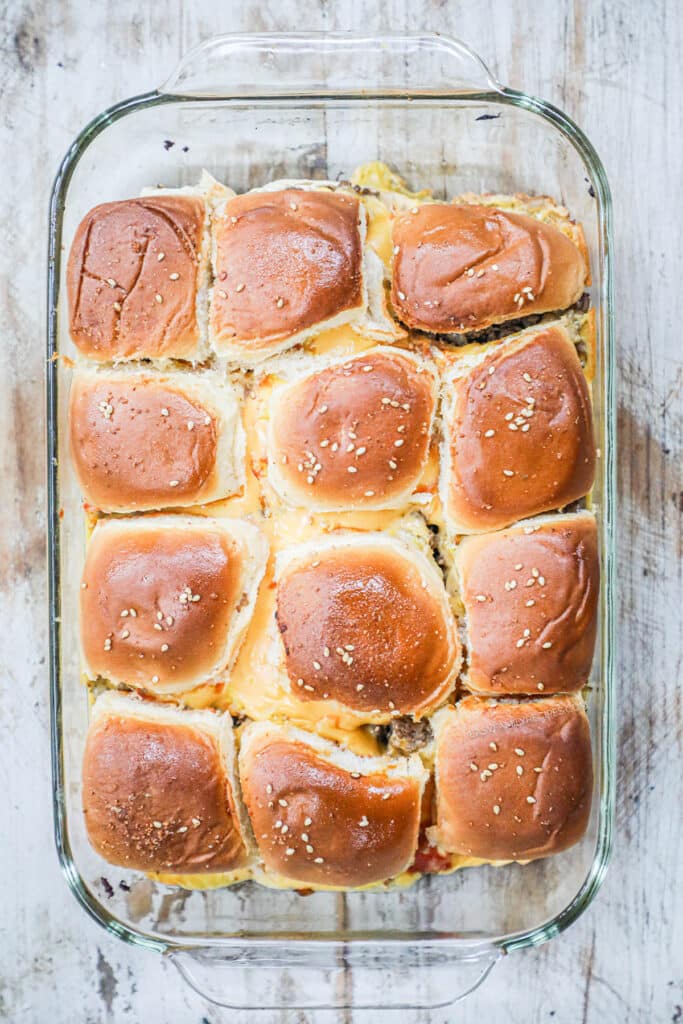
Spread the garlic butter glaze over the tops of the rolls and sprinkle with sesame seeds. Then bake until the cheese is melted and the Hawaiian rolls are soft.
Recipe Tips
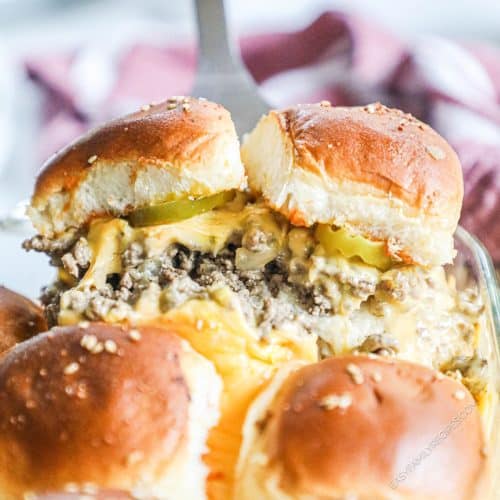
- Cut – before and after – Hawaiian rolls come attached to each other so you can easily slice them horizontally in half before assembling. Before baking and putting the glaze on, run a knife along the top lines to cut through the sandwiches. This allows the garlic butter to soak into the sides of the sliders and makes it easier to serve once baked.
- Multiply – This recipe makes 12 sliders but you can easily make double that with 24 rolls and two pounds of beef.
- Warm ketchup, trust me! Not everyone likes the idea of warm ketchup and mustard, but just like fast food burgers, we love to bake these sliders with the condiments. If that is not your jam, you can serve the ketchup and mustard on the side (but I highly recommend giving it a try!).
Recipe Short Cuts
If you need to make this recipe but are extra short on time, here are a few ideas that can help make this recipe even faster!
- Make the beef ahead– You can make the seasoned beef up to 2 days in advance and store it in the fridge until ready to use. This will cut the time in half when you make these pull-apart cheeseburger sliders.
- Freezer meal– These sliders can be made up to 6 months in advance with just a few simple steps listed below.
Recipe Variations
If you love this recipe as much as we do and want some quick ways to change it up for variety, these little tips will do the trick!
- Bacon Cheeseburger Sliders – To make this tasty version, fry up or bake some bacon and simply add it on top before baking the sliders.
- Bacon Cheeseburger Sloppy Joe Sliders – We love sloppy joes! And the slider versions are just so fun. For this variation, mix the ground beef, onion, and Worcestershire with the ketchup and mustard in the pan until a saucy beef mixture comes together. Then add 2 tablespoons of brown sugar
- Cheeseburger Garlic Knot Sliders – Garlic knots make perfect buns for hamburger sliders. Try subbing out the Hawaiian rolls for garlic knots.
What to Serve with Hawaiian Roll Cheeseburger Sliders
Since this dish has the classic flavors of fast food takeout, it will pair well with many of your favorite American-style side dishes. There are both classic options and some healthy options to keep it light.
Side Dish Ideas
- Baked Potato Wedges – get the french fry feel, made lighter in the oven
- Baked Mac and Cheese– This is grandma’s recipe!
- Million Dollar Dip
- Ranch Smashed Potatoes – one of the most delicious ways to make potatoes
- Antipasto Salad
- Veggies and Ranch dressing
- Garlic Parmesan Roasted Broccoli– My kids think this is the best way to eat broccoli!
You can choose one or add a few sides to make a wholesome, well-rounded dinner.
Freezer Meal Instructions
Making this slider recipe into a freezer meal is simple! Follow the steps below and you can store this recipe in the freezer for up to 6 months.
- Assemble the ground beef and cheese on the rolls and spread the ketchup and mustard on the rolls. Place them in a freezer-safe bag or air-tight container. It can be helpful to wrap them tightly in plastic wrap before putting them into a bag or Tupperware to keep the filling from sliding out.
- Mix the garlic salt and butter and store in a separate freezer-safe container.
- Freeze both sauces and sandwiches.
- When ready to enjoy the sandwiches, thaw the sauce in the microwave or by leaving in the fridge overnight. Unwrap the rolls and transfer them to an oven-safe baking dish if needed. Brush the sauce over the frozen rolls.
- Bake as directed.
Slider Leftovers
If you have leftovers after making the best cheeseburger sliders ever, then it is your lucky day! They save and reheat well, and can make the start of another delicious dish.
To save leftovers, separate into meal-sized portions and then place them in an airtight container and store them:
- in the refrigerator for 3-4 days
- in the freezer for up to a month
More Slider Recipes
If you enjoyed this recipe, I really hope you will take a moment to grab a few more easy recipes for another busy night!
You can check out all of my Easy Dinner recipes here, or see a few of our reader’s favorite slider recipes below.
- Cuban Sliders
- Shredded Chicken Sliders
- Italian Grinder Sliders
- Baked Roast Beef Sliders
- Meatball Parmesan Sliders
- Baked Turkey Cheese Sliders
Hawaiian Roll Cheeseburger Sliders
Ingredients
- 12 slider rolls
- 1 pound ground beef
- 1/2 onion, diced
- 1 tablespoon Worcestershire sauce
- Salt and pepper, to taste
- 6 slices American cheese
- 1 tablespoon ketchup
- 1 tablespoon mustard
- 12 dill pickle slices
- 2 tablespoons butter, melted
- 1/8 teaspoon garlic salt
- 1/2 teaspoon sesame seeds, optional
Instructions
- Preheat the oven to 350˚F.
- Heat a large skillet over medium high heat. Once hot, add the ground beef and onion and cook, breaking apart the beef and stirring regularly until fully cooked, about 5-6 minutes. Drain any excess grease, then stir in the Lea & Perrins Worcestershire sauce, and season to taste with salt and pepper.
- Split the slider rolls in half horizontally, and lay the bottom in a baking dish. Layer on the ground beef, then cover with American cheese, and pickles.
- On the inside of the top half of the rolls, spread ketchup and mustard evenly over the surface, then place the top of the rolls over the bottom half.
- Stir the garlic salt into the melted butter until it is dissolved, then brush it over the top of the cheeseburger sliders. Sprinkle the sesame seeds on to finish.
- Bake for 15-20 minutes or until the cheese is melted and the tops are golden brown. Enjoy!
Recipe Notes
- Ground Beef – I use lean ground beef because there is less fat to deal with. However, you can use any beef because you will drain the fat anyways.
- American Cheese – You can also use Colby jack, pepper jack, mozzarella, or others.
- in the refrigerator for 3-4 days
- in the freezer for up to a month


Leave a Reply