Dutch Oven Roast Chicken is a classic recipe that’s both incredibly easy and feels like the kind of fancy main dish you make for a special occasion. With a garlic butter rub and plenty of flavor, it’s destined to be a family favorite!
It’s time to go back to basics with this whole roasted chicken recipe. Whether you’re a beginner cook or a seasoned pro, this is one of those dishes that everyone should know how to make. Once you have the technique down, you’re going to find yourself making it again and again! You should consider making this as a Sunday dinner because it really does feel special! I also have compiled a great Sunday Night Dinner List that is full of other ideas.
Of course, basic doesn’t mean it’s not impressive—because this Dutch oven roast chicken is a real treat. Juicy, tender, and infused with flavor in every bite. It’s everything you want in a classic chicken recipe, minus the fuss!
Why I LOVE this recipe!
- Incredibly delicious – This is one of those classic recipes that never fails to impress. The garlic butter rub and herbs make for a flavorful, mouth-watering dish that everyone in the family will love.
- Easy to make – The recipe might look long, but that’s only because I shared lots of detail—not because it’s hard! With just a few simple ingredients and minimal effort, there’s really not much to it. Just prepare the chicken, season it, pop it in the Dutch oven, and let it do its magic!
- Meals for days – If you’re making this for a weeknight dinner for your immediate family, you’ll have leftover roast chicken that you can repurpose for additional meals throughout the week.
- Versatile – Add your favorite herbs and spices and customize it to your family’s tastes!
What is a Dutch Oven?
A Dutch oven is a heavy-duty pot with a tight-fitting lid, usually made of cast iron or enamel. It’s perfect for slow cooking, roasting, and braising as it distributes heat evenly and retains moisture.
Recipe Notes
This Dutch oven whole roast chicken recipe is as simple as promised! Just a few minutes of prep for a family friendly meal.
In this section I am going to go through a few tips and tricks I use for how to make Dutch oven roast chicken to get the absolute best and most delicious results.
Make sure to scroll to the bottom for the FULL recipe card.
Ingredients + Substitutions
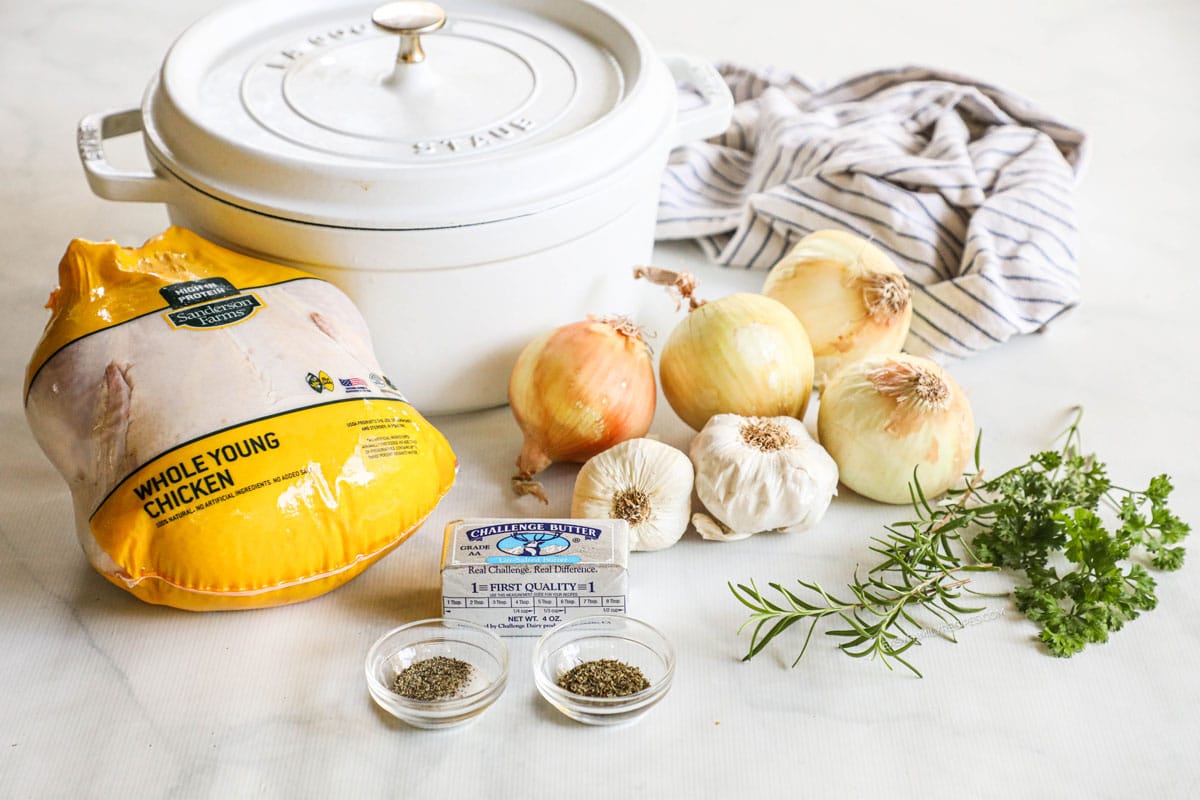
- Onions – Save the ends for adding to the cavity.
- Whole chicken – Use a 4-5 pound chicken for Dutch oven roasted chicken.
- Garlic – You’ll add whole cloves to the cavity.
- Fresh rosemary – Fresh herbs add great flavor to the chicken. I like rosemary, but thyme sprigs and sage are also fantastic.
For the Garlic Herb Butter
- Butter – Soften the butter so it’s easy to mix in the other ingredients.
- Fresh parsley – Finely chop the parsley.
- Italian seasoning – Offers lots of herbal flavor in one convenient jar.
- Kosher salt and ground black pepper – For perfect roast chicken.
- Garlic – Push this through a garlic press or mince it very finely.
Make sure to see the recipe card at the bottom of this post for the full quantities and ingredients list.
Recipe Variations
If you love this recipe as much as we do and want some quick ways to change it up for variety, these little tips will do the trick!
- Herb Roasted Chicken – Instead of making the garlic butter with only parsley, try using a mix of fresh or dried herbs. Sage, rosemary, and thyme all pair nicely with chicken. You can add any or all of these to the cavity as well.
- Lemon Roasted Chicken – For a citrusy twist, add some lemon juice and zest to the garlic butter rub, then cut the lemons into quarters and place them in the cavity. This will give your chicken a bright, fresh flavor.
- Spicy Roasted Chicken – Add some heat to your chicken by mixing cayenne pepper into the garlic butter.
Recipe Step by Step
I am going to highlight a few key steps in the recipe here, but make sure to jump down to the recipe card for comprehensive instructions on how to make Dutch Oven Roast Chicken.
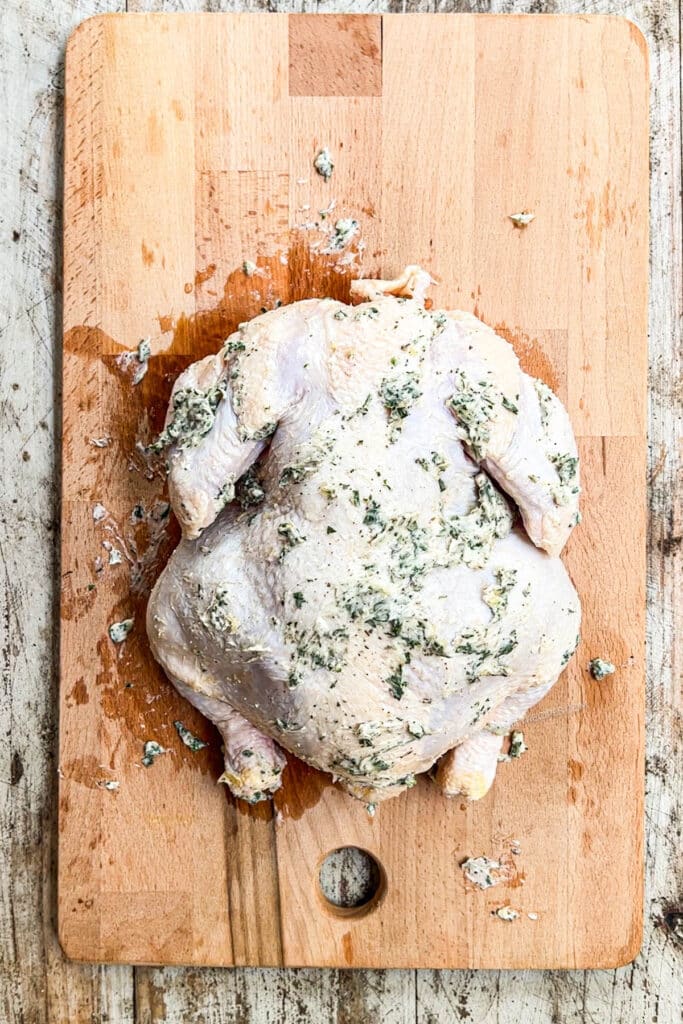
Prepare the chicken by adding garlic cloves, onion ends, and rosemary to the cavity, then spreading garlic butter all over the bird and between the breast and skin.
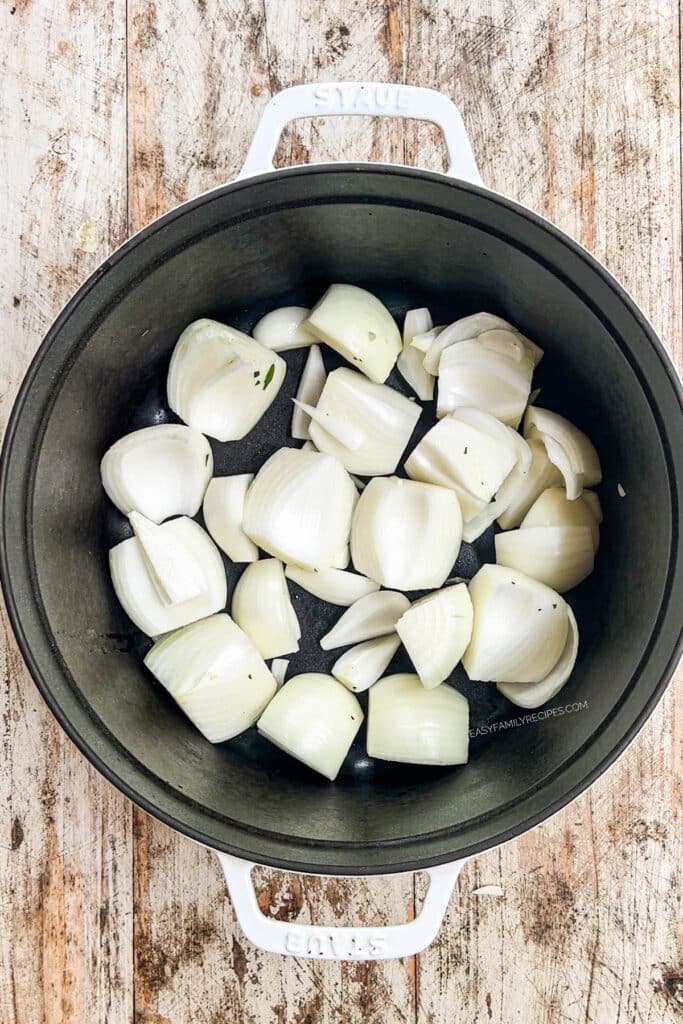
Add onions to the bottom of the pot.
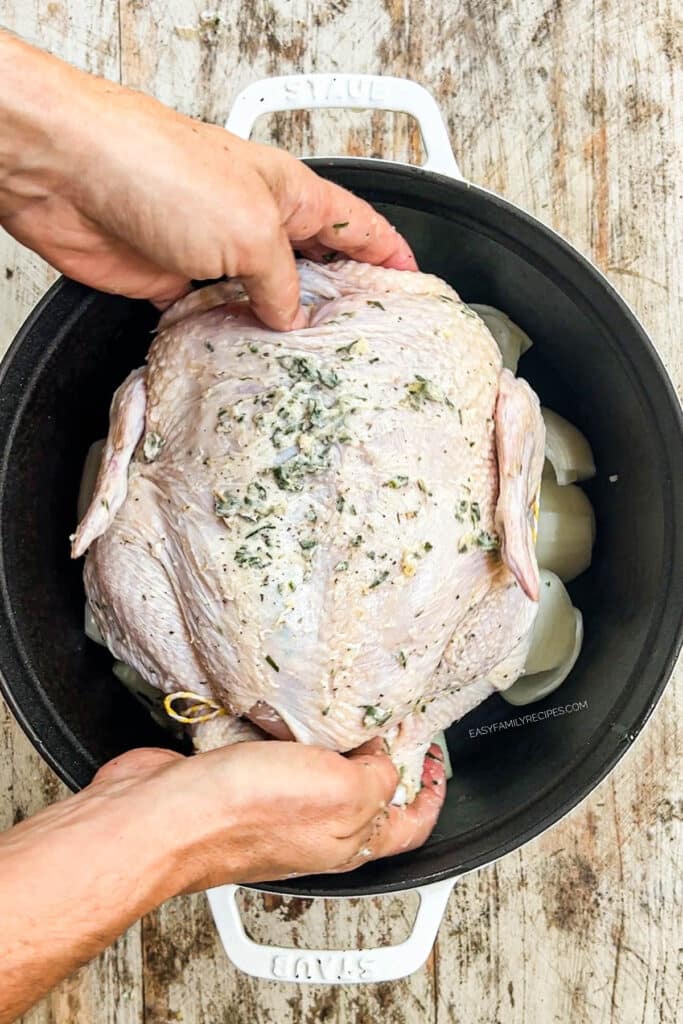
Truss the chicken and place it in the Dutch oven on top of the onions.
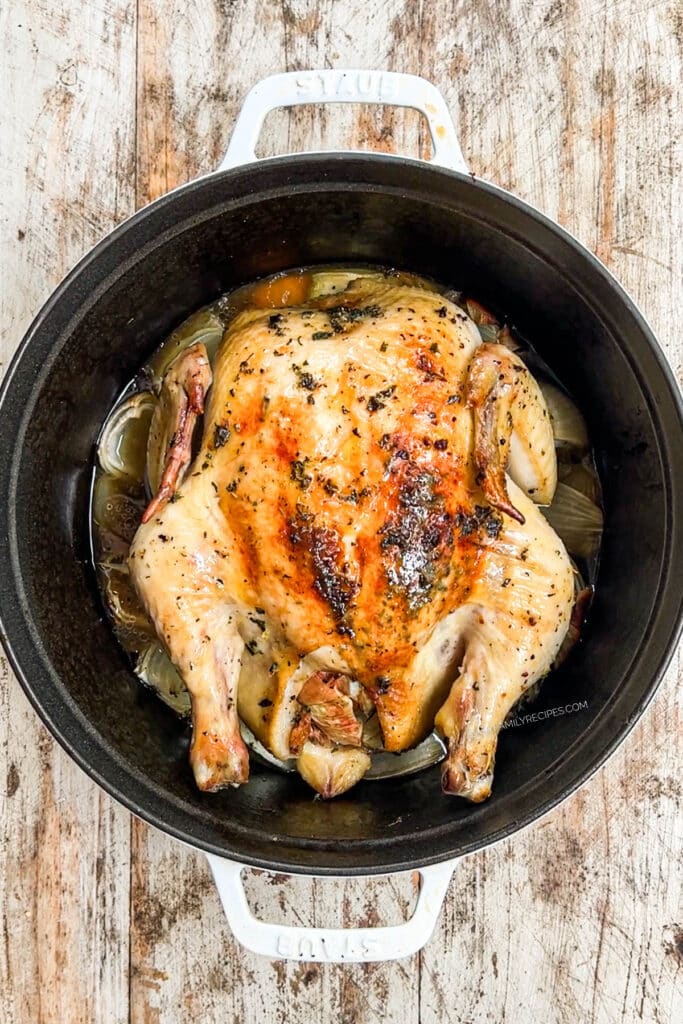
Roast the whole chicken until the skin is crispy and the thickest part of the thigh reaches 165ºF on an instant-read thermometer.
Recipe Tips
- Dry the chicken well – This is key to getting the garlic butter to stick. Use paper towels to pat the chicken completely dry.
- Spread the garlic butter everywhere – All over and in between the skin (just be careful not to tear it!), over the chicken and inside the cavity. Don’t be shy!
- Don’t skip the resting time – Letting the chicken rest after roasting allows for even distribution of juices, making it moist and tender. I let it rest for 15 to 20 minutes.
- Use a meat thermometer – This is the most accurate way to determine if your chicken is fully cooked. The internal temperature should read 165°F. If it doesn’t, continue cooking it in 5 minute increments until it reaches this temperature.
- Save the carcass – Don’t throw away the bones! Use them to make chicken broth or homemade chicken stock for soups and stews.
Recipe Short Cuts
If you need to make this recipe, but are extra short on time, here are a few ideas that can help make this recipe even faster!
- Use store-bought garlic butter – If you’re in a pinch, you can use pre-made garlic butter from the store instead of making your own. Just spread it all over the chicken before roasting.
- Skip the trussing if needed – Trussing the chicken helps it cook evenly and stay tender and juicy, but if you’re in a time crunch, you can skip this step.
- Cook a smaller chicken – You can shorten the cooking time by using a smaller chicken. Cook for 20 minutes per pound, plus 15 minutes.
Freezer Meal Instructions
Making this Dutch oven chicken recipe into a freezer meal is simple! Follow the steps below and you can store this recipe in the freezer for up to 6 months.
To freeze before cooking
- Mix together the garlic butter as directed.
- Rub the butter mixture over the chicken, cover and freeze before cooking.
- When ready to cook, remove from freezer and let thaw in fridge overnight.
- Add the garlic, onion ends, and herbs to the chicken’s cavity and cook according to the recipe directions.
How to Freeze Dutch Oven Chicken After Cooking
- Once the chicken has cooled, remove all meat from the bones.
- Chop or shred into bite-sized pieces.
- Place in an airtight container or freezer bag and freeze.
- When ready to use, thaw in fridge and use within 3-4 days.
What to Serve with Dutch Oven Chicken
Since this protein based dinner has the delicious flavors of oven roasted chicken, it will pair well with many of your favorite classic side dishes.
Choose one or several of these side dishes to create a wholesome, well-rounded dinner. There are both classic options and some healthy options to keep it light.
Side Dish Ideas
- Brown Butter Broccoli
- Garlic Parmesan Mashed Potatoes
- Parmesan Roasted Cauliflower
- Herb Roasted Potatoes
Dutch Oven Whole Chicken Leftovers
If you have leftovers after making this recipe, then it is your lucky day! They save and reheat well, and can make the start of another delicious dish.
To save leftovers, separate into meal sized portions and then place in an airtight container and store:
- in the refrigerator for 3-4 days
- in the freezer up to a month
Leftover Recipes
Here are a few ways to repurpose those leftovers and give them a delicious makeover!
- Chicken pot pie – Both the leftover chicken and the onions can be added to your favorite homemade chicken pot pie recipe. Try this EASY Crustless Chicken Pot Pie!
- Chicken salad – Shred or chop the chicken and mix in some mayo, diced celery, onions, and grapes for a tasty sandwich filler or cracker topper. This Cranberry Pecan Chicken Salad is also delicious.
- Chicken Alfredo pasta – Use leftover chicken, Alfredo sauce, and your favorite pasta for a quick and delicious dinner.
- Chicken quesadillas – Shred the chicken and add it to a tortilla with cheese, salsa, and black beans for a kid-friendly dinner.
- Chicken noodle soup – Use the leftover chicken bones to make a homemade stock, then add your favorite veggies, noodles, and shredded chicken for a comforting, hearty bowl of soup. Follow the steps in this Rotisserie Chicken Noodle Soup recipe!
- Buffalo Ranch Chicken Salad – having shredded chicken on hand makes this go even faster!
Recipe FAQ’s
What size Dutch oven do you need to roast a whole chicken?
A 4-5 quart Dutch oven is the perfect size for roasting a whole chicken. This allows enough space for the chicken to cook evenly and for any additional ingredients, such as vegetables, to fit comfortably.
What temperature should you roast a chicken in a Dutch oven?
I recommend preheating the oven to 425ºF and then reducing the temperature to 350ºF after you place the Dutch oven with the chicken in the oven. This allows the chicken to cook through evenly and ensures crispy skin on the outside.
How long do you cook Dutch oven chicken?
The cooking time for Dutch oven roasted chicken will depend on the size of the chicken and your oven, but a general estimate is 20 minutes per pound plus 15 minutes. That said, it’s always best to use a meat thermometer to check for doneness rather than relying solely on cooking time.
Do you need to cover a chicken when roasting?
Every oven is different, but I don’t think there’s a need to cover chicken a Dutch oven so I chose not to. If you notice the skin is starting to get too browned, you can loosely tent the chicken with foil.
More EASY Chicken Recipes
If you enjoyed this recipe, I really hope you will take a moment to grab a few more easy recipes for another busy night!
You can check out all of my easy chicken recipes here, or see a few of our readers favorite recipes below.
Dutch Oven Roast Chicken
Ingredients
For the chicken
- 4 onions, ends removed, then quartered
- 1 whole chicken, 4-5 pound
- 3 cloves garlic
- 2 sprigs rosemary
For the Garlic Herb Butter
- 1/4 cup butter softened
- 2 tbsp fresh parsley, finely chopped
- 1 teaspoon Italian seasoning
- 1/2 teaspoon kosher salt
- 1/2 teaspoon ground black pepper
- 1 clove garlic, pressed
Instructions
- Preheat oven to 425˚F.
- To prepare the garlic butter, combine the softened butter with the parsley, Italian seasoning, salt, pepper and garlic. Set aside.
- Place the onion quarters in the bottom of the dutch oven. Save the end pieces to stuff the cavity.
- Prepare the chicken by removing anything from the cavity, including neck, and/or giblets.Then use paper towels to pat the chicken dry.
- Fill the cavity with the ends from the onion, 3 garlic cloves, and rosemary sprigs.Then use your hands to rub the garlic herb butter all over the outer skink of the chicken, front, back and sides. Gently lift the skin from the chicken breast and rub the garlic butter between the skin and the breast. Be careful not to tear the skin.Tie the chicken with baker's twine (truss the chicken) so that the wings are tucked in and the legs are held tight. This is optional but does help the bird to stay compact so that it cooks more evenly.
- Place the chicken breast side up into the dutch oven and set it on top of the onions.
- Put the dutch oven into the oven, uncovered, and immediately reduce the heat to 350˚F. Bake for 20 minutes per pound, plus 15 minutes. (So for a 4 pound bird this is 1 hour and 35 minutes. For a 5 pound bird this is 1 hour 55 minutes).Once the time is up, check the temperature of the chicken by inserting a thermometer into the thigh close to the bone. The chicken should read at least 165˚F. If it is not done, return the chicken to the oven and continue to cook in 5 minute increments until the chicken reaches 165˚F internal temp.You do not need to cover the chicken while baking. This will allow the skin of the chicken to get crispy and flavorful. If you find that the top of the chicken starts to brown more than you want, you can place the lid of the dutch oven on at that point, or loosely tent foil over the top of the dutch oven.
- Once done, allow the chicken to rest for 15-20 minutes. Then carve and serve warm. Drippings can be spooned over the meat, or strained and used to make gravy.
Recipe Notes
- Basting: It is not necessary to baste the chicken for a super tender juicy roast chicken. If you want to baste, you can do so half way through cooking.
- Stuff the Cavity: You will not eat the fillings used to stuff the cavity of the chicken. This is why we can use the ends of the onion. They help add flavor to the chicken and then are discarded after cooking. You can add other seasonings or vegetables to the cavity if you prefer.
- If chicken is getting too brown: The chicken will cook uncovered to get that coveted delicious crispy skin. If you find that the skin is getting more done than you prefer, you can either place the lid on the dutch oven, or loosely tent aluminum foil over the dutch oven for the remainder of the cooking time.
- Potatoes, carrots, or other vegetables: You can add potatoes, carrots or other root veggies, that take a long time to cook, in the bottom of the pan in addition to the onions.

















Leave a Reply