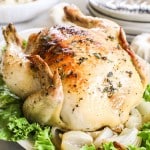
Mother's Day Roast Chicken
Easy enough for a weeknight dinner, fancy enough to serve on Mother's Day. This Dutch oven whole roasted chicken is going to be a favorite and you family will be very impressed!
Servings: 4
Calories: 563kcal
Ingredients
For the chicken
- 4 onions ends removed, then quartered
- 1 whole chicken 4-5 pound
- 3 cloves garlic
- 2 sprigs rosemary
For the Garlic Herb Butter
- 1/4 cup butter softened
- 2 tbsp fresh parsley finely chopped
- 1 teaspoon Italian seasoning
- 1/2 teaspoon kosher salt
- 1/2 teaspoon ground black pepper
- 1 clove garlic pressed
Instructions
- Preheat oven to 425˚F.
- To prepare the garlic butter, combine the softened butter with the parsley, Italian seasoning, salt, pepper and garlic. Set aside.
- Place the onion quarters in the bottom of the dutch oven. Save the end pieces to stuff the cavity.
- Prepare the chicken by removing anything from the cavity, including neck, and/or giblets.Then use paper towels to pat the chicken dry.
- Fill the cavity with the ends from the onion, 3 garlic cloves, and rosemary sprigs.Then use your hands to rub the garlic herb butter all over the outer skink of the chicken, front, back and sides. Gently lift the skin from the chicken breast and rub the garlic butter between the skin and the breast. Be careful not to tear the skin.Tie the chicken with baker's twine (truss the chicken) so that the wings are tucked in and the legs are held tight. This is optional but does help the bird to stay compact so that it cooks more evenly.
- Place the chicken breast side up into the dutch oven and set it on top of the onions.
- Put the dutch oven into the oven, uncovered, and immediately reduce the heat to 350˚F. Bake for 20 minutes per pound, plus 15 minutes. (So for a 4 pound bird this is 1 hour and 35 minutes. For a 5 pound bird this is 1 hour 55 minutes).Once the time is up, check the temperature of the chicken by inserting a thermometer into the thigh close to the bone. The chicken should read at least 165˚F. If it is not done, return the chicken to the oven and continue to cook in 5 minute increments until the chicken reaches 165˚F internal temp.You do not need to cover the chicken while baking. This will allow the skin of the chicken to get crispy and flavorful. If you find that the top of the chicken starts to brown more than you want, you can place the lid of the dutch oven on at that point, or loosely tent foil over the top of the dutch oven.
- Once done, allow the chicken to rest for 15-20 minutes. Then carve and serve warm. Drippings can be spooned over the meat, or strained and used to make gravy.
Notes
- Basting: It is not necessary to baste the chicken for a super tender juicy roast chicken. If you want to baste, you can do so half way through cooking.
- Stuff the Cavity: You will not eat the fillings used to stuff the cavity of the chicken. This is why we can use the ends of the onion. They help add flavor to the chicken and then are discarded after cooking. You can add other seasonings or vegetables to the cavity if you prefer.
- If chicken is getting too brown: The chicken will cook uncovered to get that coveted delicious crispy skin. If you find that the skin is getting more done than you prefer, you can either place the lid on the dutch oven, or loosely tent aluminum foil over the dutch oven for the remainder of the cooking time.
- Potatoes, carrots, or other vegetables: You can add potatoes, carrots or other root veggies, that take a long time to cook, in the bottom of the pan in addition to the onions.
Nutrition
Serving: 0.25chicken | Calories: 563kcal | Carbohydrates: 12g | Protein: 37g | Fat: 40g | Saturated Fat: 16g | Polyunsaturated Fat: 7g | Monounsaturated Fat: 15g | Trans Fat: 1g | Cholesterol: 173mg | Sodium: 522mg | Potassium: 560mg | Fiber: 2g | Sugar: 5g | Vitamin A: 817IU | Vitamin C: 15mg | Calcium: 69mg | Iron: 2mg